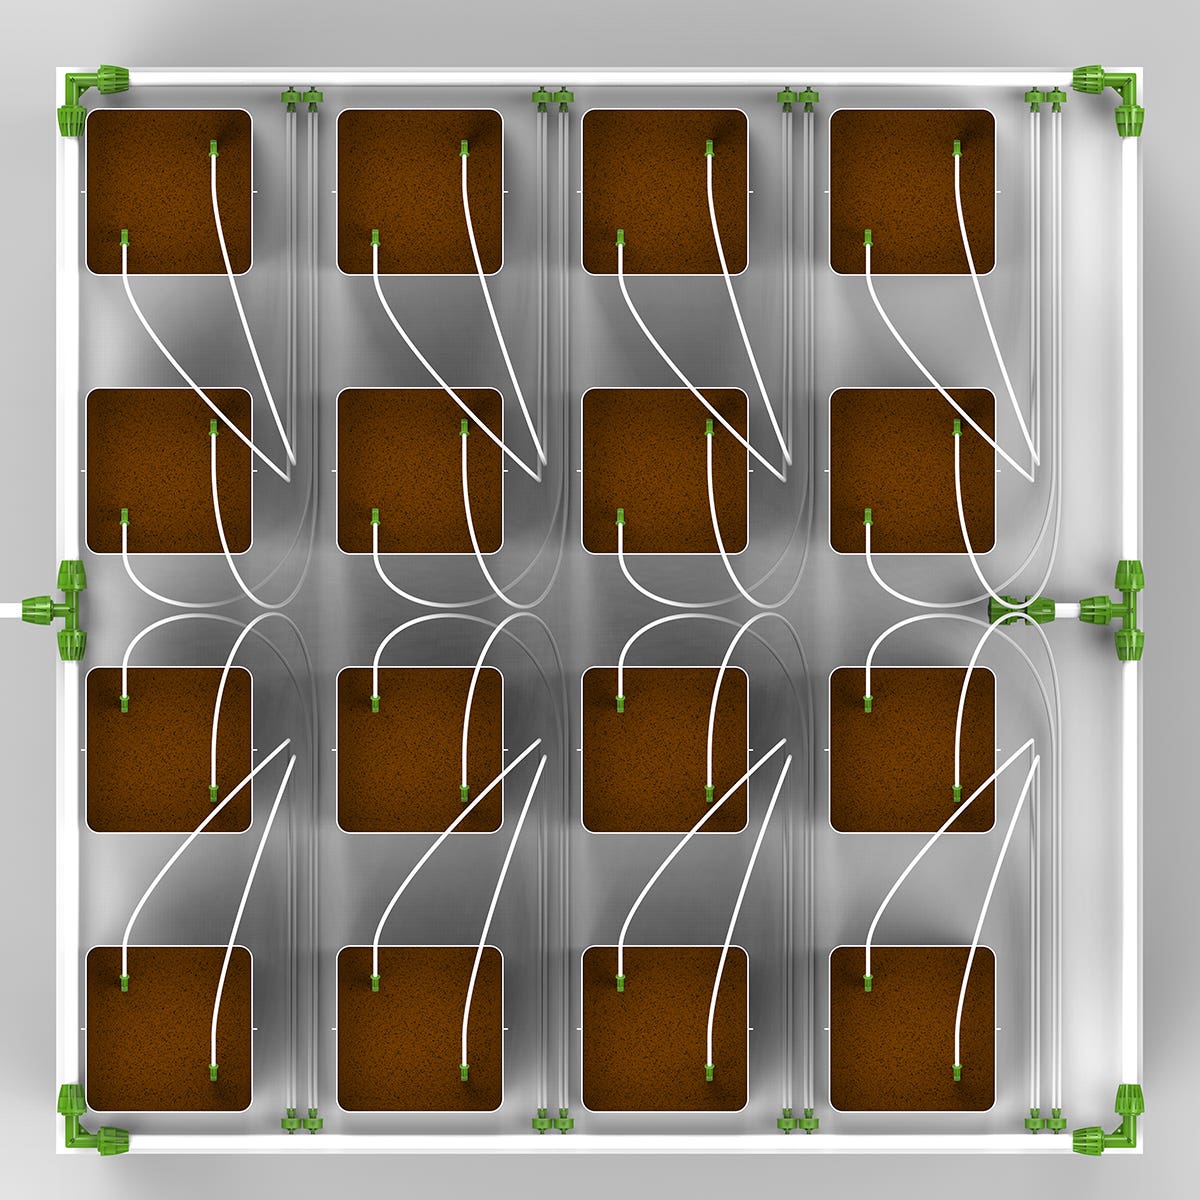
Micro Dripper Stake Assembly Installation Steps.
Step 1
Start at the front of your table
Step 2
Roll the Double Layer Tubing out to the length of your table/zone. Tape it down every 2-3’ with painters tape. Cut once you get to the end of the table. Repeat for each side of the table/zone.
Tip: tape can be removed after 24-48 hours of the system being assembled in a warm environment.
Step 3
Use a 16/17mm Elbow and connect the Double Layer Tubing at each corner of the table.
Tip: Push and twist the 16/17mm tubing onto the barb of the pipe fitting until it is secure.
Step 4
Cut (1) piece of 6” tubing out of the Double Layer Tubing.
Step 5
Connect a 16/17mm x 3/4” Male Adapter to this (step 4).
Step 6
Connect (step 5) to the center outlet of a 16/17mm T pipe fitting.
Step 7
At the front and center of the table, cut and remove a 2” length of the Double Layer Tubing and install (step 5) in this gap.
BACK OF TABLE
Step 8
Cut (1) piece of 6” tubing out of the 16/17mm Double Layer Tubing.
Step 9
Connect a 16/17mm x 3/4” male adapter w/ cap combo to (step 8)
Tip: remove this cap and install a psi gauge here.
Step 10
Connect (step 9) to the center of a 16/17mm T pipe fitting.
Step 11
At the back and center of the table, cut and remove a 2” length of the Double Layer Tubing and install (step 10) in this gap.
Step 12
Using the Flora Puncher punch the holes for your Micro Dripper Assemblies.
Tip: lay the plants or pots out on the table before installing the micro dripper assemblies.