
Cloning cannabis plants is an essential technique for growers aiming to replicate their best genetics and maintain consistent harvests. The 40|40 Incubator Plugs offer a streamlined and efficient solution for propagating healthy cannabis clones, providing the ideal environment for root development. By following these detailed steps, you can ensure success in your cannabis cloning journey, maximizing growth potential and overall plant health.
Preparing 40|40 Incubator Plugs for Cannabis Cloning
Proper preparation of the 40|40 Incubator Plugs sets the stage for successful cannabis clone propagation. This critical step ensures the plugs are ready to support the unique needs of cannabis cuttings.
•Air Out the Plugs
After removing the 40|40 Incubator Plugs from their packaging, allow them to sit in open air for 12–24 hours. This acclimation period ensures they’re free of excess moisture and ready to absorb nutrients.
•Mix a Nutrient Solution for Cannabis Clones
Combine 1 gram of B1 and 1 gram of B2 nutrients with 1 mL of Root Drip per gallon of water. This mixture provides the clones with essential nutrients for the rooting process, specifically tailored to cannabis plants’ needs.
•Pre-soak the Plugs
Submerge the plugs in the nutrient solution for at least two minutes, ensuring they are fully saturated. The pre-soaked plugs create the perfect environment for cannabis clone rooting by delivering nutrients directly to the cutting’s base.
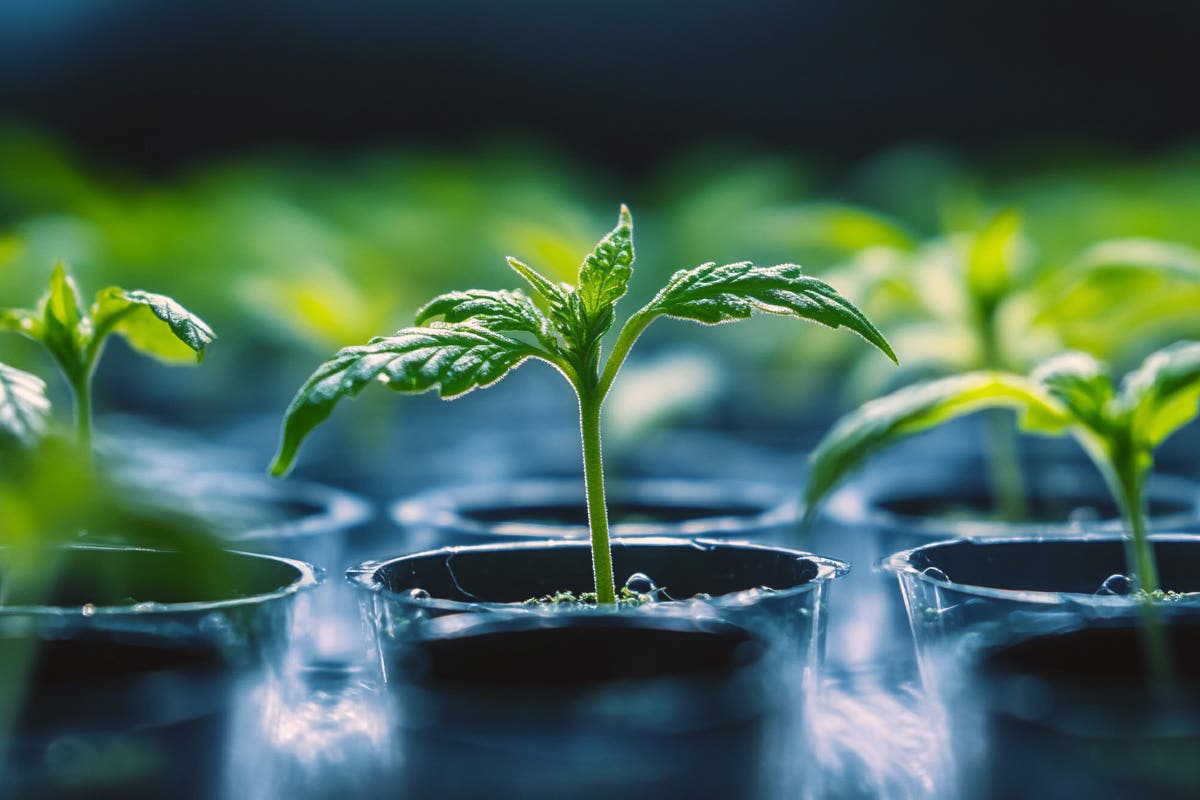
Selecting and Preparing Cannabis Clones
The health and vigor of your cannabis clones are paramount. Start with a robust mother plant and follow these steps to prepare cuttings that are primed for success.
•Choose Healthy, Vigorous Growth
Select clones from the top of a healthy mother plant. Cannabis cuttings should measure 4–6 inches in length and come from the plant’s upper branches, where growth is most vigorous and rooting potential is highest.
•Make a Clean, Angled Cut
Using sanitized, sharp scissors or a razor blade, cut the stems at a 45° angle. This angled cut increases the surface area for rooting and minimizes tissue damage, which is crucial for cannabis clones.
•Prevent Shock with Immediate Placement in Nutrient Solution
Immediately after cutting, place the cannabis clones in a cup of the prepared nutrient solution. Maintaining a pH between 5.5 and 6.0 ensures optimal nutrient uptake and minimizes transplant shock.
Inserting Cannabis Clones into Incubator Plugs
Once your cannabis cuttings are prepared, the next step is to secure them in the 40|40 Incubator Plugs.
•Insert Clones Properly
Position the clones into the pre-drilled holes of the incubator plugs, ensuring they are inserted halfway to two-thirds down. A snug fit is critical to maintaining stability and encouraging strong root development.
{{widget type="Magento\Cms\Block\Widget\Block" template="widget/static_block/default.phtml" block_id="799"}}
Creating the Perfect Cannabis Cloning Environment
Environmental control plays a significant role in the successful propagation of cannabis clones. Maintain the following conditions to optimize root formation.
•Provide Ideal Lighting
Expose the clones to 18–24 hours of light with an intensity of 80–160 µmol. This consistent light exposure encourages robust root development in cannabis cuttings.
•Seal the Dome for Humidity Control
Place the Incubator Dome over the tray, ensuring it is tightly sealed with vents fully closed. This creates a high-humidity environment that is essential for unrooted cannabis clones.
•Maintain Temperature and Humidity
For unrooted clones, keep the temperature between 75°F and 80°F with relative humidity at 75%–80%. As roots develop, gradually reduce the humidity to 65%–70% while maintaining consistent temperatures.
Foliar Feeding and Ventilation for Cannabis Clones
Cannabis clones benefit greatly from foliar feeding and controlled ventilation as they progress through the rooting phase.
•Apply Foliar Spray for Stress Reduction
Spray the clones with Veg Foliar at a pH of 5.5–6.0. This provides direct nutrient absorption, reducing stress on the cannabis cuttings and encouraging healthy growth.
•Introduce Ventilation Gradually
On Day 3, start cracking open the dome’s top vents to allow a minimal amount of fresh air to circulate. Gradually increase airflow by sliding the dome slightly forward or backward, ensuring the clones acclimate to lower humidity levels.
•Remove the Dome Completely
By Day 10–14, remove the humidity dome entirely. This allows the cannabis clones to adjust to the ambient environment and prepares them for transplanting.
Monitoring Root Development in Cannabis Clones
Closely observing the progress of your cannabis clones is crucial to timing the next steps.
•Check for Root Growth Daily
Most cannabis clones begin to show root development within 7–14 days. Inspect them daily to ensure consistent environmental conditions and track their progress.
Transplanting Rooted Cannabis Clones
Once your cannabis clones establish strong root systems, they are ready for transplanting into a larger growing medium.
•Select an Appropriate Pot Size
Transfer the rooted clones into pots or cubes no larger than one gallon. This allows the roots to expand gradually and ensures optimal nutrient uptake without overwhelming the young cannabis plants.
•Maintain Nutritional Support
Prepare a new nutrient solution with 5 grams each of B1 and B2 nutrients and 5 mL of Root Drip per gallon of water. Continue feeding the cannabis clones with this mixture to support ongoing growth and development.
Maximizing Success in Cannabis Cloning Propagation
The 40|40 Incubator Plugs simplify cannabis cloning by providing the ideal conditions for root development. By carefully preparing the plugs, selecting healthy cuttings, and maintaining precise environmental controls, you can achieve high success rates. This process not only ensures consistency in your cannabis garden but also allows you to preserve and replicate your best genetics for future harvests. With attention to detail and commitment to the outlined steps, cloning cannabis with 40|40 Incubator Plugs can be a highly rewarding practice.
{{widget type="FloraFlex\Blog\Block\Widget\ProductList" products_count="5" conditions_encoded="^[`1`:^[`type`:`Magento||CatalogWidget||Model||Rule||Condition||Combine`,`aggregator`:`all`,`value`:`1`,`new_child`:``^],`1--1`:^[`type`:`Magento||CatalogWidget||Model||Rule||Condition||Product`,`attribute`:`category_ids`,`operator`:`==`,`value`:`99`^]^]" template="FloraFlex_Blog::widget/productlist.phtml"}}